How To Install WordPress in cPanel Using Softaculous | WordPress Guide – Step 3
Hi Readers, In this post we will learn How To Install WordPress in cPanel Using Softaculous Step By Step & No Steps Skipped. Before moving to the installation guide, Here’s a quick intro about Cpanel.
What is cPanel?
It is a control panel which is associated with a domain (if provided by Hosting provider of that domain) for exp www.yourdomain.com/cpanel . It is one of the most popular control panel.
How to Install WordPress using Cpanel.
In order to install WordPress you first have to get to c-Panel page. Here’s how you can get to cpanel page for different type of hosting Plans. (If you already know how to get to C-panel page, Skip this part)
For Example
- Single Domain Hosting.
- Multi Domain Hosting. (where more than one domain is hosted under one plan. For exp Baby Plan of HostGator).
For Single Domain
Note: You may be using a multi domain hosting package but it is possible that you have one domain under that plan. In that case follow these steps.
Go to your domain URL, For exp www.yourdomainhere.com/cpanel. You will get to this Page (See image Below).

Once you have reached your c-Panel Login Page. Enter your Username & Password. (which is sent by your hosting provider on your registered Email ID )
For Multi Domain Hosting Package/Multiple Domains
In order to get to your c-Panel, use the Primary Domain associated with that account/package. For exp www.primarydomainhere.com/cpanel. If you are unable to get to your c-Panel Page, Contact Us We are Happy to Help or you can also Contact your Hosting Provider.
Here’s How to Install WordPress Using Softaculous
(Rest of the Procedure is Almost Same for both type of hosting.)
Once you are Logged in, Scroll down & Find the Softaculous App Installer Section & Click on WordPress Icon. (See Image Below).

After clicking on WordPress Icon, Click on Install on the top left of the page and follow the instructions.

First Section Software Setup (See screenshot above)
- In this choose a protocol for your website/blog.
Pro Tip: Use http://www. since it is the most commonly used protocol.
- Choose domain. (available for multi domain Package/hosting).
- Choose directory by default it will be installed wp directory. (what does this mean? for exp if you use default directory i.e wp then your wordpress will be installed in that directory for exp www.yourdomain.com/wp.
Pro Tip: Leave it blank.
___________________________________________________________________________

Next Section Database & Site Settings
- Set the table prefix for your database. (by default it is set as wp_ ).
Pro Tip: Set a unique table prefix. (Since it helps in keeping your WordPress website secure).
- Set site name & description. (This can be changed anytime later).
- Multi site option. (It is used to access some features of a website on other WordPress websites within the network for exp plugins & themes.)
Pro Tip: You can enable this if your server supports multi site. (contact your hosting provider for more details).
___________________________________________________________________________

Admin Account Settings
This is the most important section regarding your WordPress website account Security.
- Set Admin Username. (by default it is Admin.)
Pro Tip: Never Use admin, your name, site name as your username. (Since it makes your website vulnerable to attacks). Choose a unique username.
- Same goes with the password.
- Leave admin email as it is or you can change it as per your choice.
___________________________________________________________________________
Few Miscellaneous options
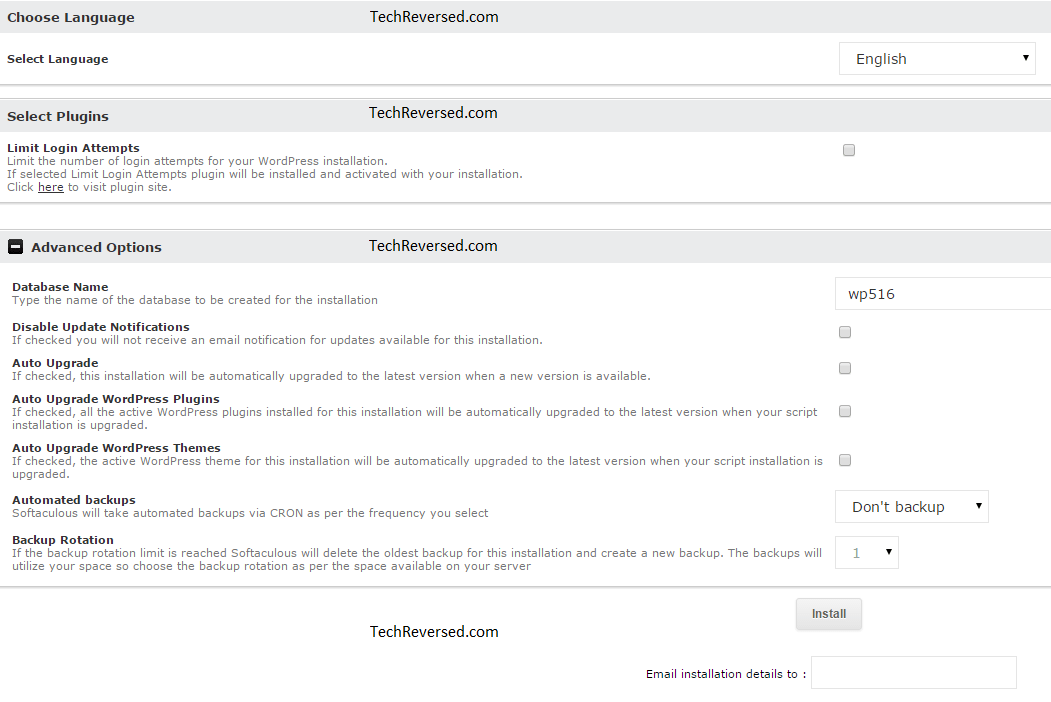
- Select preferred language.
- Limit Login attempts. It installs a plugin which limit login attempts to your WordPress website. But this plugin is no longer updated and might not be supported with latest version of WordPress.
- Set Advanced options as per your choice.
- Before clicking on install, Provide your Email ID where the installation details will be sent. Save it some place safe.
- Finally Click on Install, Voila you Have your Brand new WordPress website Ready.
___________________________________________________________________________
That’s it for this Tutorial. In the Next tutorial we will get to know the Top Plugins every WordPress Blog Should Have.
…
Share your views via comments.